Thursday, 31 July 2014

BIG SHOT & BUNDLES 1-31 August


If you're anything like us, you absolutely love when BIG opportunities come your way. And because we all know the Big Shot is a big deal, we thought we'd offer you something you couldn't miss; an exclusive Big Shot opportunity that lasts for the entire month of August!
When you purchase of a Big Shot in August, you will receive one of five free stamp set/Framelits bundles below, their choice! That's up to a $100 AUD value!!
Not only that, but if they already own a Big Shot, they can still purchase these designated bundles at an amazing 15% off! This is one deal they won't want to miss-only available from 1-31 August-as these bundles are one-time only exclusives.

Two Choices:
1) Buy a Big Shot and get a free bundle below.
  and/or

2) Buy a discounted bundle below at a 15% discount.

Bundle
Item
Number
Stamp Set
Framelit
AUD
NZD
Sumthin' with Bubbly Words
Clear-Mount Bundle
138920
Sumthin' Sumthin'
Word Bubbles
$ 54.25
 $ 65.25
Sumthin' with Bubbly Words
Wood-Mount Bundle
138923
Sumthin' Sumthin'
Word Bubbles
$ 58.50
 $ 70.25
Decorative Goodies
Clear-Mount Bundle
138921
Oh My Goodies
Deco Labels Collection
$ 62.75
 $ 76.25
Decorative Goodies
Wood-Mount Bundle
138924
Oh My Goodies
Deco Labels Collection
$ 72.95
 $ 88.25
Celebrating Chalk Talk
Clear-Mount Bundle
138922
Day of Celebration
Chalk Talk
$ 65.95
 $ 77.95
Celebrating Chalk Talk
Wood-Mount Bundle
138925
Day of Celebration
Chalk Talk
$ 74.50
 $ 90.75
Flowery Daydream
Clear-Mount Bundle
138910
Daydream Medallions
Floral Collection
$ 82.25
 $ 99.95
Flowery Daydream
Wood-Mount Bundle
138911
Daydream Medallions
Floral Collection
$ 93.25
 $ 113.75
Bright & Beautiful Stars
Clear-Mount Bundle
138200
Bright & Beautiful
Star
$ 75.50
 $ 91.50
Bright & Beautiful Stars
Wood-Mount Bundle
138644
Bright & Beautiful
Star
$ 87.25
 $ 105.95

Contact me for my information and to place your order!

Tuesday, 1 April 2014

WEEKLY DEALS


Each Wednesday in April, we'll be bringing you a new set of deals on a selection of fantastic products. Contact me to place your order and be sure to check back each week to see what's on sale so you can to take advantage of these great deals before they're gone!

Dates: 2-29 April 2014


 Large Pearl Basic Jewels $6.71


 Midnight Muse 3/8" Stitched Satin Ribbon $11.96


 Raspberry Ripple 3/8" Stitched Satin Ribbon $11.96


 Summer Starfruit 3/8" Stitched Satin Ribbon $11.96


 Wild Wasabi Stampin' Emboss Powder $6.38


 Vintage Trinkets $7.46


 Mom, I Love You Digital Ensemble (digital download) $6.57


Thursday, 30 January 2014

Texture Boutique


It's embossing made easy. Texture Boutique is the perfect, portable tool to create embossed cards, tags, embellishments, and more. Use it with our Stampin' Up! Exclusive Textured Impressions Embossing Folders.


The Texture Boutique Embossing Machine works with Textured Impressions Embossing Folders to transform ordinary cardstock, paper, metallic foil, or vellum into an embossed, textured Masterpiece.


This machine embosses only; it does not die cut. Comes with 1 pair of Standard Embossing Pads and 1 Mylar Shim.


Texture Boutique Embossing Machine 
item 132657
$49.95


TALK TO ME TODAY TO GET YOURS!

Want to order online and have it shipped to your door
click on the link below to take you to my online store. 


Remember you can always ring/email/message your order through...

0411480072

Cheers Jody

Thursday, 16 January 2014

Wow I can’t believe my months holiday is now over, what a fun filled time the whole family has had, It was a very busy few week before Christmas finishing of a lot of shopping and a early family gathering for those that would be afar on Christmas day, It was a quite Christmas lunch this year without Michael’s Mum and John this year but we understand we do have to share them sometimes and they did have a wonderful time in WA with other family, we did have a lovely lunch with my Mum and Dad and Michaels Dad and Max, then a great night at my sisters with the rest of the family. New year’s seen a lot more Family get togethers and so much fun, The rest of our holidays was filled with lots fun things we stayed in Sydney for a few days and done all the normal thing you get up to down and the kids loved it, Nate loved The Sydney Tower that much we had to go back, Liam and Kiara both loved Madame Tussauds, it was a great surprise for Kiara to see the 1D guy’s and Kate and Will who she just love’s. Well I have so much to catch up on now my holiday is over that I better get started, stay turned to see all that is happing in Stampin’ Up! And Stampin4All! <3

Friday, 20 December 2013

A little Ocean Fun

Here are some of the cards we have made in class lately.


I am loving the beautiful cards I have made recently with the Stamp set By the Tide.

Envelope Punch Board Projects

What great fun was had by my lovely class ladies making these cutie little boxes and bows using the Envelope punch board.

By Jody Fennell Independent Stampin’ Up! Demonstrator Images © 2013
(While using DSP make sure you only score lightly so you don’t tear paper)


Bow Using Envelope Punch Board
You will need-
1 strip of each in DSP,
1”x6”
1”x 3 ½”
 ¼” x 1 ¼ “
Tape/ Glue dots
Using the 6” strip, place it at the 3” mark on the punch board and punch, turn over and punch the other side.
Now to do the ends, line them up with the open mouth of the punch and punch all 4 sides. Use your bone folder to curl paper.
Tape middle of bow and join both ends together.
Take the ¼ “piece and wrap around the join and tape down.
Now using the 3 ½ “strip punch at the 1 ¾ mark on your board, turning and doing the other side. Now for the ends, centre tail into the centre of the punch to make tails do both ends.  Now to join together you can leave the tails straight or have then hanging down by just folding it slightly before attaching to bow.


Candy Cane Treat Box
You will need-
5 ½ “x 5 ½ “piece of DSP
Glue Dots
Ribbon
Line up DSP at the 2” mark then punch and score, slide to the 2 5/8” mark and punch and score.
Turn 90° line up score lines and punch and score doing the next 2 sides, on the 4th side DO NOT score only punch at the marks.
Round all corners, fold all score lines 6 in total.
On the bottom score lines cut out the little corners.
Fold up the bottom and add a glue dot to the top corner, fold over one side and affix to glue dot, add glue dots to both side tips and fold over last side and affix together, decorate with ribbon and add candy canes.


Mini Open Basket
You will need-
6” x 6” piece of DSP
Small punch of choice for handle
Tape/ Glue Dots
Step 1- Taking your 6” x 6” piece of DSP line it up at the 1 ½ “ mark, punch and score, turn and line up at the 2 ½ “ mark, punch and score, turn again line up at 1 ½ “ mark, punch and score, the turn again lining up at 2 ½ “ mark, punch and score.

Step 2- Now using the score lines you have just made line them up with the score line marker and punch and score all 4 sides.
Step 3- Round all 4 corners.
Step 4- Fold all score line by hand (no need to use bone
folder when using DSP as it’s a thinner paper and my tear).

Step 5- Punch holes to make handles on both sides.
Step 6- Fold in the corners on each end and tape flaps down.


Mini cracker using the envelope punch board
You will need-
DSP (Paper Stacks or 4.5"x 6.5" piece)
Score Board
Envelope Punch Board
Tape
Using Designer Series Paper Stacks in the seasonal catalogue as your starting point: each sheet measures 4.5"x 6.5" so it makes the score measurements really easy:
Using score board or score tool- score at 1", 2", 3" and 4" on the short side, and 1", 1.5", 2", 4.5", 5" and 5"5 on the long side.
Fold 1", 2", 3" and 4" score lines, on the other line fold in a mountain valley mountain fold on both ends.  
Using the Envelope Punch Board- fold the first of the long length folds and line up to the 1.5 mark then punch, move along to the 5” mark and punch, fold paper over again and repeat continuing to do all folds, on the widest side punch threw single paper to complete the holes needed.

Now all you need to do is tape both sides together and add ribbon and decorated with a tag.


12”x12” No Cut Folding Gift Box Tutorial

12”x12” No Cut Folding Gift Box

You will need score board, bone folder, tape.

Step 1: Score at 1 ½”, 3” & 3 ¾”


Step 2: Turn paper 180°

Score at 1 ½”, 3” & 3 ¾”

Step 3: Turn paper 90°

Score at 3” & 4 ½”

Step 4: Turn paper 180°

Score at 3” & 4 ½”

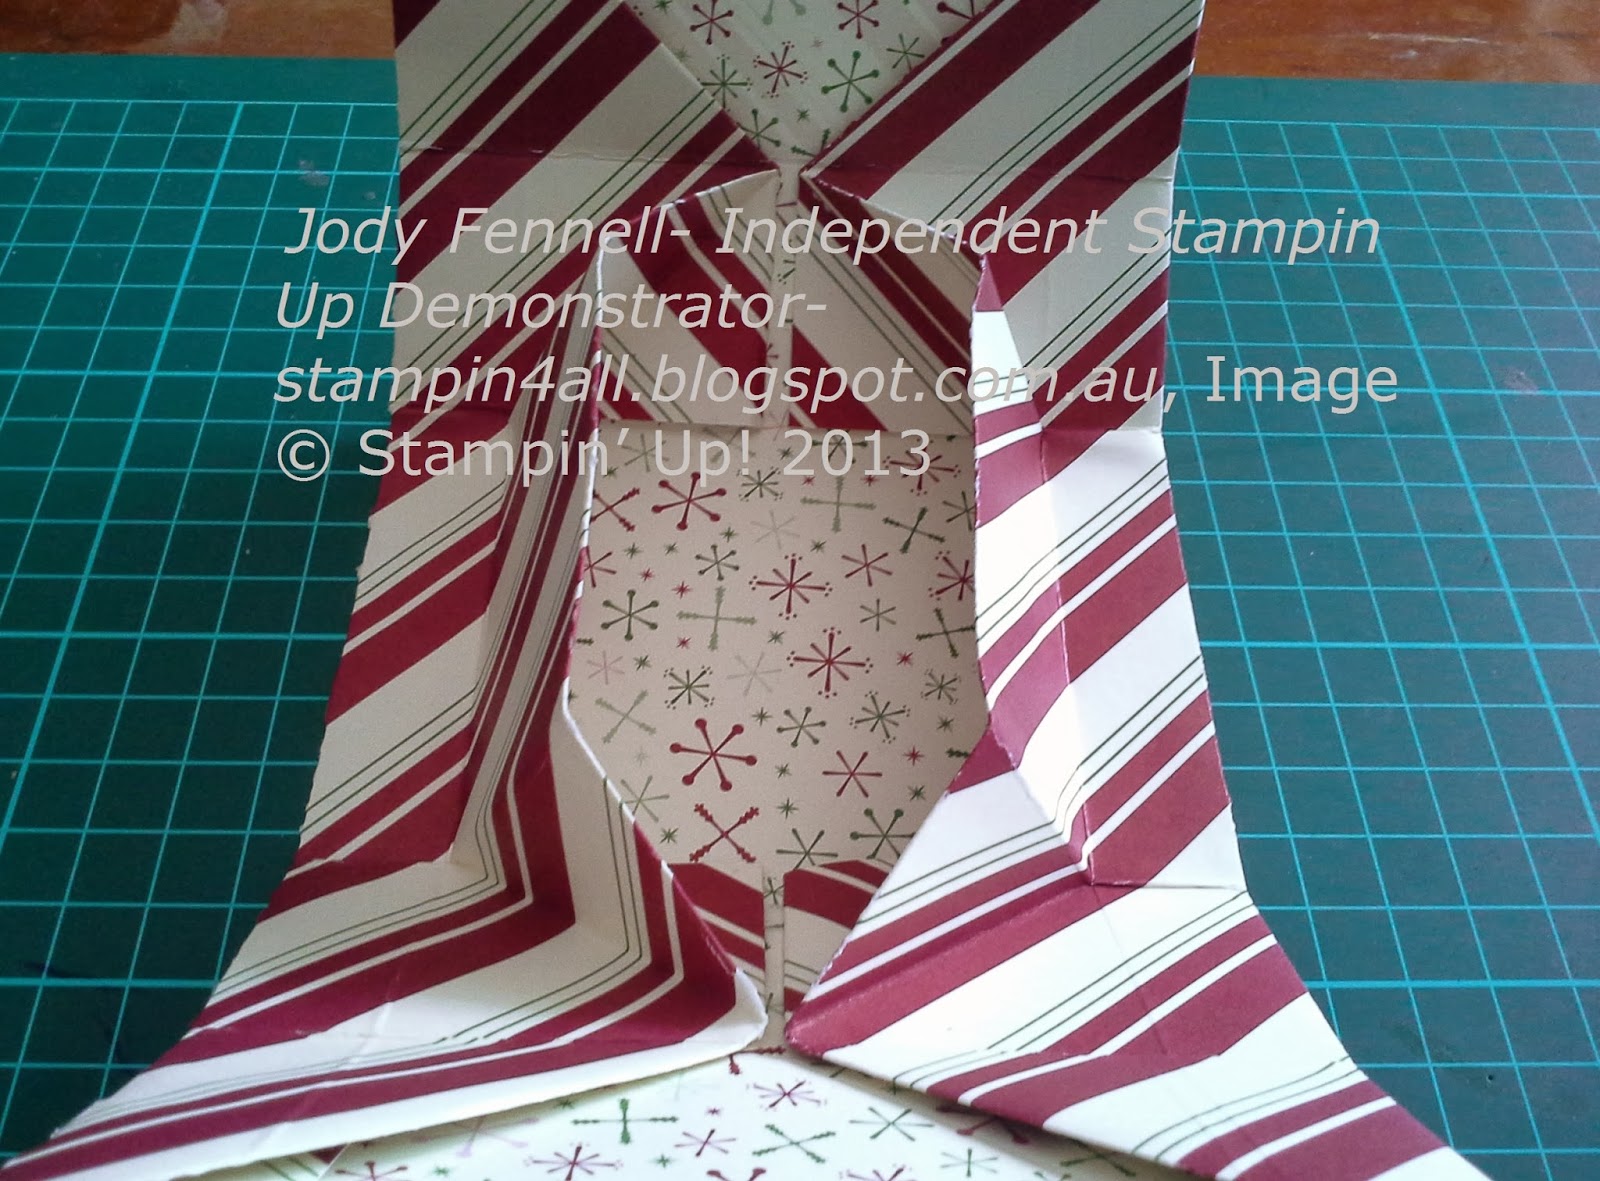
Step 5: At the 4 ½” score lines fold down

 corner lining up along the score lines


Step 6: Turn 180° and do the same as step 5

Step7: Turn 90°.Turn the 1 ½” score line in on both sides.

Step 8: Open the fold back up and lift

 the corner into a lifted triangle

Step 9: Lay them flat over the side fold.

Step 10: Do all four corners.


Step 11: Score all lines, 2 on top and bottom,

 1 on both sides, now tape between the 2 score lines.

Step 12: Fold over the side.

Step 13: Fold other side to meet in centre.

Step 14: Now this is the hardest part,

 you need to slide your bone folder under those
 folds and open and press back to make a crisp fold.

Step 15: Do the other side; you will start to see 

the box taking shape at this stage.

Step 16: Do all 4 corners to create box centre.


Step 17:  Fold box and make a belly band to keep it closed,
 this one is a 1 ¼” X 10” piece of card stock
 but can be any width you like,
 and embellishments can be made with many different things.


Jody Fennell
Blog: www.stampin4all.blogspot.com.au
Facebook: www.facebook.com/Stampin4All
Phone: 0411480072